Thursday, November 18, 2010

Into the Darkroom!

I am more than pleased to announce the official opening of my new black and white darkroom!  Shortly after starting to shoot film on a 4x5 view camera, I realized that to really control the entire process in a meaningful way, I needed to be able to work in a darkroom.  There is one in Troy, NY, about 30-40 minutes away, but there are certain problems using a community darkroom miles away.  And it just wasn't efficient for me.  It would take me much longer to become proficient as well, and, well, I really don't want to take this slowly.  I have a lot to learn.

After I get back from the "west coast" trip, I hope to spend some time in there developing and printing.  Here are a couple of overviews of the space...

Darkroom is about 8x12'
Durst 4x5 Enlarger and Print Easels

The sink is 6 feet long by about 30 inches deep.  I've installed a ventilation fan to the outdoors over it, as well as hot and cold water that I can regulate and monitor with a built-in thermometer.  I put the enlarger on a low platform, because the ceiling is low and I can print up to 20"x24" prints in the current configuration, but the enlarger almost hits the ceiling to do this.  IN the photo it is set up for 11x14 prints.  On the wall is mounted the enlarger's timer.  Almost everything in the darkroom was purchased second-hand, and there are really good bargains to be found in darkroom equipment.  Even the counter top I purchased for $35 from a contractor who had it leftover.

Delta One Sink with water supply, filter and large print trays.

Upper Counter with Print Washer and Jobo Rotary Processor

In the corner, between the sink and the countertop is a small upper counter, where I can place the Jobo Rotary Processor, which is a tank that I develop photo negatives in.  Processing chemicals are poured in and out of the tank, the tank rotates on the base, and the contents are poured out into the sink or into containers for re-use/re-cycling.  Next to the Jobo Processor is the large acrylic print washer.  Prints need to be thoroughly washed of processing chemicals.

Plumbing was pretty straightforward, from hot and cold lines just outside the room, and draining into the main sewer drain plug in the bottom corner of the room.  GFCI's just had to be added to the electrical circuits in the room, the fan wired, and that was that.  There's plenty of room for storage too, and safelights mounted on the wall for use during print processing.

What do you think?

Thursday, September 30, 2010

Practice Practice Practice!

Basic camera light meters are good for grabbing memories on the run.  But the more I photograph, the more I realize that they only get the photo I'm looking for about 1/3 of the time!  They average the light in the frame and give you a compromise exposure.  Safe, but not always effective.

Here's one, for example, where I knew that I wanted the person's skin to be lighter than average, and it's the darkest part of the photo:

With the white background, the meter would have made the skin much darker than normal, but that's not what I was going for (sorry I didn't do a darker one for comparison).

Ansel Adams had an approach that he used mostly with black and white called the zone system.  This is what many people shooting with meter-less cameras, especially large format, use.  A spot meter is used to take readings of very specific, small areas of the composition to be photographed, and those readings are placed on a sliding scale from dark to light (oversimplifying to say 0-10 from dark to light, but we'll use that).  A typical wide area light meter determines an average for the equivalent of 5 (in the middle).  In the photo above, her skin would have come out to about 3 or 4 because the background would have been about 6 or 7, and the two would have been averaged.  In the actual photo above, the skin is about zone 5-7 or so, and the background about zone 9.

Below are four photos of the same subject with different exposures from average to darker, each separated by the equivalent of one full f-stop on the camera (which is roughly equivalent to one step on our 0-10 scale).

1/30 sec @ f/2.8
1/60 sec @f/2.8
1/120 sec @f/2.8
1/250 sec @f/2.8

The first photo was the camera meter's average.  Great for a snapshot.  But what if you wanted the grass and the white box exposed better?  Halving the exposure is a step in the right direction, and the grass is more naturally green.  The third and fourth photos put the box in about zone 4-6, at the expense of the darker background.

OF COURSE THERE IS NO OBJECTIVE CORRECT EXPOSURE, just decisions on what the photographer and viewer may be looking for.

So, these are not great artistic examples, but good enough to explain the basics.  Why am I concerned with this?

My large format camera has NO meter in it.  I use a spot meter to meter the grass, tree trunks, background foliage and the box separately and then decide where to lay them out along the zone system scale of 0-10.

However, I'm not that experienced at doing this and judging where on that scale each item should be located.

So, I've pledged to spend some time PRACTICING!  What I am doing is taking my spot meter out and making educated guestimates where parts of a scene go when visualizing.  Instead of wasting lots of film in practicing, I am using my digital camera in MANUAL mode, and testing out these guestimates to experience what the results actually are.

This is harder than it might sound.  Eventually, however, it will help me to be more confident when spot metering with the film camera, and more adventurous with the digital camera.

Just like I pretty much don't use the automatic focus on my digital camera anymore unless it's a fleeting moment.  I can focus better and quicker doing it myself!

Saturday, August 14, 2010

Slowing Down


One of the attractive things to me about using a large format view camera is that you have to slowwwwww dowwwwwwnnnnnnn....

It's probably one of the things that keeps so many people away from large format film.  A photograph is an event—to plan, to prepare for, to execute, to document, to review and to revisit.  You inherently miss a lot of other shots.  That's what my digital camera is for.

Not that I just shoot willy-nilly with the digital, but when I do use the camera I can easily grab a new view here and there, and often take dozens of photos in the time it would take me to do one large format photo.  Both have their place.  Besides getting a lot of nice photos, digital is a lab, a sketch, a draft which can be refined, discarded, used or thrown away.  No big deal—(no) film is cheap!

With the large format camera, however, you have to almost meditate on the shot, from the first notice of a visual opportunity, to composition, angles, perspectives, light characteristics, setup logistics and much more.  You better have a decent idea of what you're going to do before you do it.  No point and shoot here.  Besides the planning and conceptualization, there is the mechanical process of taking a photo.  To borrow from another photographer, Bruce Barlow, there are both process/technical and artistic/conceptual sides to large format photography.  Both are very important.  But, the best happens when you do one while the other is on auto-pilot because you've had experience.

I'm still getting there.  I've ruined a photograph because I've concentrated so much on technical aspects, worrying about focus, not exposing the film prematurely and so on to the point of clicking the shutter without due consideration to the photo itself.

I have also taken what I assume were wonderful photos, only to have them ruined by making a significant technical error....like exposing the wrong side of a sheet of film!

That's the learning process.  But now, it is getting more meditative as the technical becomes more second nature.

Monday, August 9, 2010

Large Format Film So Far...

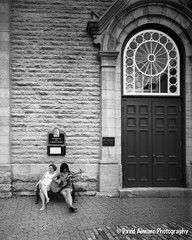
Outside Chapelle Des Ursulines


Always more to learn, though. Putting a basic darkroom in my basement!!! Realized that large format film and darkroom are like horse and carriage...

In this photo, simple things like the fact that I'm near ground level, but I'm using a wide angle lens to capture a good deal above, yet the perspective is not skewed because I'm not pointing the camera up (I could if I wanted to, even exaggerate it), instead, I'm shifting the front of the camera up in parallel to the back!

Tuesday, August 3, 2010

An interesting antique...

I picked up this very old lens for a song.  It's in beautiful shape, and considered to be an excellent lens still today.  It will be extremely sharp, but will impart a slightly ethereal feel to the photo being taken.  It has no shutter, and four aperture settings by a combination of levers.

Once I get it fitted to a lens board for my view camera, I'll be able to use a relatively slow film and cover the lens with something like a hat to use as a shutter; or I have a mechanical Packard shutter I can hang on the front and shoot roughly between 1/25th of a second and forever...

Always another challenge down the road!

http://www.davidaimone.com/p68515664
Darlot Hemispherical Rectilinear Lens circa 1869
Paris, France

Friday, July 9, 2010

More 4x5 Film

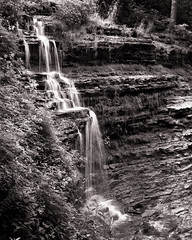
Talcott Falls Monochrome

I've been shooting some 4x5 film with a view camera, and slowly getting tuned to the process. This one I developed myself and then scanned the negative into photoshop. This was a black and white negative, and just toned it a bit on the computer.

Here are some more large format film shots.

Wednesday, June 30, 2010

Monhegan Part 2

I've been back for a while and have processed quite a few digital and will also have additional film shots soon.  Here's one on film from Monhegan:


Soon it will be time for Quebec City!

Sunday, June 6, 2010

Monhegan

Well, it's been a while since my last post.  I don't know if anyone is reading these, so I should view it more as a journal.

I've been on Monhegan Island for almost a week now.  The weather changes minute by minute.  This place is not the real world, yet it's very real and earthy.  I have taken 100's of photos, and have shared a few initial edits on Flicker.

The large format 4x5 film shots number more in the 10's, but it's been enjoyable.  Hopefully, they will come out well and over the next weeks and months, as they are developed, I will post them on my site and in this blog.

In the meantime, below is an abstract of one of the cliffs/rocks on monhegan.

Tuesday, May 11, 2010

Learning a lot -- brain feels like a sponge!

It's been quiet for me recently with photos...no show at the moment.  And I've been learning the craft of large format film.  Very enlightening.  It's changing the way I look at taking photos, and makes me even more conscious when using digital cameras as well.  I've made lots of mistakes in this process.  The first batch of 4x5 film was loaded backwards--I was essentially exposing the back of the film!  That "first" photo below, the one with the flower, candle and box was one of these.  WAY under exposed negative, so I had to over compensate in printing.  Not really sharp and weak contrasts.

The slight downside is that I have to be patient.  I have taken what I think will be some nice film photos, but I have to go into the darkroom again and develop, then print.  This all takes time.  When I do color, or have a lot of film exposed, I will consider sending to the lab at least for developing the film.  After that, I can either print myself (black and white) or scan the negatives and send out for printing.

It feels like I've gone through an entire college curriculum over the last year. But the foundations are important, and enable me to take a more instinctive/intuitive approach now (as it becomes more second nature).

Tuesday, April 27, 2010

Firsts!


First photo from my Chamonix 045n-2 large format view camera with 4x5 black and white film. First time developing my own negatives. First time printing my own prints. New to the view camera and process.

Not a great photo, but it's a start. High contrast lighting here. Shallow depth of field on this one focuses on the box and the wooden figure.

This whole process was very elemental and educational, from determining exposure levels and focusing and composing upside down and reverse; to loading and unloading the sheet film holders; processing the negatives with a sequence of chemicals that had to be mixed and brought to proper temperature; to projecting the image onto photo paper and determining print times; to burnishing; and finally to processing the print though numerous chemical baths--and so on.

There was a bit of a problem with the developing tank (see dark area on right). Next time will use a Jobo.

Fomapan 100 4x5 sheet film

Scanned on a cheapo scanner...

Thursday, April 1, 2010

New Camera — Large Format Film!


Handcrafted in China, this camera takes 4x5 sheets of film, and can do things with perspective and focus that ordinary film and digital cameras (and even photoshop) cannot!

I'll be doing a crash course in the entire process, and really put it through the paces during a week stranded on Monhegan Island, Maine, in early June.

Friday, March 19, 2010

Waterfalls...

Near to Saratoga (very near), are some really beautiful waterfalls.  They are right next to the road, but you can't see them and therefore are still a pretty well-kept secret.  Perhaps also because the lower falls (not in these photos) is harder to get a good, unobstructed view of.  I will be posting some photos of the lower falls later.

The first one is a 1 second exposure processed in color.  It was processed using Nik Software and for high tonal contast. It looks a little like a HDR photo, but it isn't.


This second one was a 13 second exposure using a darkening filter to keep enough light out to allow for the longer exposure.  Both were taken on tripods.


I'll be doing more experimentation with these waterfalls, including more photos shot recently.

Believe it or not, these falls sometimes dry up in the summer!

Wednesday, March 3, 2010

Uncommon Grounds — Past and Future

Just wrapped up a 5 week show at Uncommon Grounds in Albany.  32 photos were shown.

On March 28th, a 4 week show at Uncommon Grounds In Saratoga Springs, my hometown, will start.  I hope to see you there---an opening party will be held 6-9 on Saturday, April 3rd.  That's also Saratoga's First Saturday, so there will be other openings in town.


Friday, February 26, 2010

Revisiting Some Older Photos

With the cold, wind and snow, I've decided to go back and try reprocessing some photos with Aperture and the Nik Software Complete Collection. I particularly like the Silver Efex Pro for monochrome editing. Lots of flexibility.

Here are a few quick results:


Although monochrome, the software does allow subtle shadings between the darker image toning and the paper toning.

Monday, February 15, 2010

Figure Study Workshop in Troy

On Saturday I attended a Figure Study Workshop sponsored by the Photography Center of the Capital District in Troy, NY. This is the first time I've had the opportunity to photograph this subject, and it was intriguing... A lot of distractions, though, since there were quite a few photographers in the workshop.

I've created more than one version of the photos I've processed so far. Since this is a new subject matter for me, I'm not yet quite able to visualize the final product as easily or quickly as with other subjects.

Monday, February 8, 2010

Photo in Juried Exhibition at the Photo Center of the Capital District

Boardwalk at Plum Island

Juried Exhibition—Photo Center of the Capital District

Feb 26th through March 21st
Opening Reception Feb 26th 5-9pm
Hours and Directions

Thursday, January 28, 2010

This is cool!

http://uncommongrounds.com/community/art/albany/february-art-albany/

A Couple of Things...


Yesterday I discovered and joined the PhotoCenter of the Capital District.  It looks like a good resource in Troy, about 1/2 hour away.  They have meetings, workshops, juried shows and some accessible digital and film equipment in their labs.  Also submitted five photos to their Best of 2009 juried show.  I'll let you know how it goes...

Likewise, I've entered some Saratoga-Related photos for gallery space at this June's Saratoga Arts Fest.

Also, discovered the Center for Photography at Woodstock.  This looks very interesting, but I'll wait a bit to join.  It's an hour and a half away, but might be worth the trip down there on an occasional basis.

Finally, I submitted a press release and photos to the local paper, the Saratogian, for the April Uncommon Grounds show.

Tuesday, January 26, 2010

Winter Blues


School Bell
Originally uploaded by DKAIOG
I haven't been too motivated to get out in the cold much this winter for photo shooting, so I've been doing some studio work. Most of this has been experimental and for learning, more than for creating great photographs. Practicing craft.

Also, I've been using this time to read a lot about photography and photographers. It's been a kind of independent study college curriculum (self-designed) and has included a lot of theory and visualization, or eye training. Interesting stuff.

Friday, January 22, 2010

What a GREAT little lens (and it's old and manual)!

This remains one of my favorites:


The Micro-Nikkor 55mm f/3.5.   It is ultra sharp and looks great in and out of focus!  Click on the photo to see my Flickr set with this lens.  Pardon the older shots that were more experimental, but you'll get the idea.  Best $50 I've spent on camera equipment!

Wednesday, January 20, 2010

Some quick photos after hanging 32 photos at Uncommon Grounds in Albany...


Sunday, January 17, 2010

Hanging my First Show

Tomorrow I hang 32 large framed photos at Uncommon Ground in Albany, near the State University.  They'll be there for about 5 weeks.  Then, after a month's break, at their location in Saratoga.  I'm going to have a party at that one.

Should be interesting.  I'll post some photos of the showing...(!)

Friday, January 15, 2010

Books

I took a photography course at a public school's night classes when I was barely a teenager.  I still remember all that I learned about depth of field, f-stops and exposure, and so on.  That class, and other experiences like belonging to the Ridgewood Camera Club around the same time, was valuable.  I constantly find myself more knowledgeable in areas of photography than I expected.

But now I've been trying to further educate myself.  I've gone back to the basic and have been reading about camera theory, and things like film and exposure levels and lens properties.  It's actually interesting.  Right now I am reading Ansel Adams' first book of a three part technical series.  The first is called "The Camera".  Fascinating stuff.  The second and third are entitled "The Negative" and "The Print".

Another interesting book that I finished is "Using The View Camera".

Well, now I have to focus on getting the 30 framed photos organized for the show in Albany.  I have to hang them on Monday.  I'll take some photos.

Thursday, January 14, 2010

Thoughts

I really like photography. And I think I'm pretty good at it. Much better than I am at music. At least the response has been more positive. I think I have an eye for composition, and the technical aspects.

I've learned a heck of a lot in the past two years, and I've been educating myself through online articles, discussion forums, books on various photographers and technique, and practice. It's been like taking a number of formal photography courses at my own pace. I feel like I could teach the basics now.

Lately, I've been reading up on the basic theory of the camera and lighting and even film processes. This helps me understand what is happening even with a new Digital camera. But, it has also told me that I need to work in a basic format as well. Certainly, the most basic and most flexible format is the view camera. These are not cheap, but a system can be put together for a reasonable price.

A portable field view camera in a 4x5 inch format is the way to go. You have to take a completely different, more deliberate approach to photography. And you need to understand the basics, as the camera doesn't take care of them for you. But the quality of the photos are exceptional, and there are things you can do with them as far as perspective and focus that you can't do on a handheld. At least not yet.

So, I would really like to use the years between now and retirement to bring my photographic art to a higher level, and to prepare to do this on a professional basis. I would do portraits, landscapes, etc., and would really like to do commission work (I have done a bit of that already). We'll see. For now, I will invest in the equipment and practice. I'll also try to get as many shows as possible and establish a full resume and portfolio.  Two shows on tap for this spring...

Thanks for "listening"...any advice?

Wednesday, January 13, 2010

An "Almost" Shot

This is why I should keep notes (though the exif data kept in the digital photo can help).  Here is a photo that came out extremely well, except for something strange going on in the lower left.  At first, I thought it was out of focus, but now I'm not so sure.  But something is distorting it.  I'll have to try this one again.

Apples in Monochrome

Tuesday, January 12, 2010

Photographer Spotlights #1 and #2

Check out the first two Photographer Spotlights:

Ansel Adams


Mazdamattc

Nikon D90

The Nikon D90 camera body — my main Axe...


The D90 is a high resolution camera (>12mp) with professional features.  It will also take all of the lenses in the studio collection.

Welcome!

I will use this blog to pass along new photos and updates from David Aimone Photography.  You can view the main site at:

http://davidaimone.zenfolio.com/

Or sign up for the mailing list.

There is also a fan page on Facebook.